
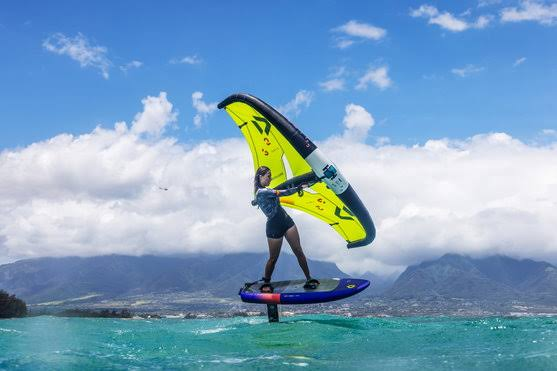
Wing foiling has grown rapidly across coastal bays, inland lakes, and ocean swells around the world. At the heart of every functional setup sits the board. Choosing the right platform determines how quickly a rider learns to stand, lift out of the water, and glide smoothly above choppy surface conditions.
Whether you are starting out or upgrading your current gear, picking proper wing foil boards makes the difference between consistent progress and constant frustration on the water. This comprehensive guide covers board mechanics, size calculations, construction materials, and design trends to help you choose the ideal setup for your skill level.
Core Factors That Define Wing Foil Boards
Understanding how a board behaves on the water requires looking at four structural elements: volume, dimensions, hull outline, and hydrofoil attachment points.
1. Board Volume (Liters)
Volume measures total floatation capacity in liters. It dictates how high the board sits in the water before you gain speed.
- Beginner Range: Rider weight in kilograms plus 20 to 40 liters. A rider weighing 80 kg should look for a board with 100 to 120 liters of volume.
- Intermediate Range: Rider weight in kilograms plus 5 to 15 liters. An 80 kg rider selects roughly 85 to 95 liters.
- Advanced Range: Rider weight in kilograms minus 5 to 20 liters. Experienced riders sink the board slightly while standing and use wind power to pull the board up to the surface.
2. Length, Width, and Thickness
Volume alone does not tell the whole story. The distribution of that volume across length and width directly impacts balance:
- Length: Shorter boards (under 5 feet 5 inches) reduce swing weight in turns once flying. Longer boards (over 5 feet 8 inches) track straight and glide easier through the water before liftoff.
- Width: Wider outlines (27 to 31 inches) provide side-to-side stability when kneeling or standing up. Narrower outlines (20 to 25 inches) create less water resistance for fast takeoffs in light winds.
- Thickness: Thicker cores pack more volume into a shorter length, maintaining stability without adding excessive length.
3. Bottom Hull Contour and Rails
The underside of the board shapes how water flows beneath it during acceleration:
- Flat Sections: Placed in the middle to maximize surface area for quick acceleration.
- Beveled Rails: Angled edges along the sides prevent the board from catching water when touching down during sharp turns.
- V-Nose Entry: Clears incoming chop and deflects water away during sudden drops, stopping nose-dives.
4. Foil Box Track System
Most modern boards feature twin US track boxes spaced 9 centimeters apart. This standard allows you to slide the hydrofoil mast forward or backward to fine-tune front-foot and back-foot pressure based on your weight and wing size.
Board Construction Types: Rigid vs Inflatable
Selecting between a rigid hardboard and an inflatable board depends on storage space, travel needs, and performance expectations.
Rigid Boards (EPS Foam and Carbon Composite)
Rigid boards use an Expanded Polystyrene (EPS) foam core wrapped in layers of fiberglass or carbon fiber.
- Direct Feedback: Energy from your feet transfers directly to the hydrofoil without flex, giving precise control during carves and pumps.
- Efficient Takeoffs: Rigid hulls release water instantly, helping you reach takeoff speed faster in light wind conditions.
- Maintenance Note: Hard shells can crack if dropped on parking lots or hit by foil wings during rough falls.
Inflatable Boards (Drop-Stitch PVC)
Inflatable designs utilize heavy-duty drop-stitch PVC technology with integrated rigid carbon bottom plates for the foil track.
- Travel Ready: Deflates and packs into standard checked luggage, making travel simple.
- Durable Outer Layer: Soft surfaces resist dings, scratches, and damage from dropped gear.
- Buoyancy Feel: Inflatable options sit higher on top of the water surface. Riders often pick 10 to 15 liters of extra volume to match the stability of a hardboard.
Primary Benefits of Choosing the Correct Board Size
Matching your equipment to your skill level speeds up skill acquisition and improves every session.
+—————————–+
| Proper Board Volume Match |
+————–+————–+
|
+————————-+————————-+
| |
v v
+———————–+ +———————–+
| Faster Kneel-to-Stand| | Smooth Touchdown |
| Transitions | | Recovery |
+———————–+ +———————–+
| |
+————————-+————————-+
|
v
+—————————–+
| Earlier Liftoff in Light |
| Wind Conditions |
+—————————–+
- Faster Kneel-to-Stand Transitions: Ample board volume stops the nose from sinking when moving from your knees to your feet in rough water.
- Smooth Touchdown Recovery: Proper rail bevels and rocker profiles allow the board to bounce off water surface touches without throwing you forward.
- Earlier Liftoff in Light Winds: A board with flat planing surfaces accelerates under wing power quickly, raising the hydrofoil into flight speed with minimal pumping effort.
- Reduced Body Fatigue: Stable platforms save physical energy during waterstarts, allowing longer sessions on the water.
Key Challenges and Pitfalls to Avoid
Many riders hit roadblocks by selecting gear based on visual appeal rather than functional fit.
Sizing Down Too Early
A frequent error is buying a low-volume board too early in the learning process. Sinking boards require complex balance and strong wind to start. If you struggle to stand up consistently, session time turns into swim time.
Ignoring Local Wind and Water Conditions
Riding on a calm lake with steady 20-knot winds requires less volume than riding on ocean chop with gusty 12-knot winds.
- Lakes with Light Gusts: Lean toward higher volume to float through wind lulls without sinking.
- Choppy Coastal Spots: Select moderate volume with pronounced nose rocker to handle incoming waves.
Mismatched Foil and Board Configuration
Pairing a high-volume board with a tiny front foil wing creates unstable pitch control. Always ensure your front wing area matches your board dimensions and total weight.
Current Trends in Board Design
Design concepts continue to evolve as riders demand better performance in varied conditions.
- Mid-Length Outlines: Designers are extending board lengths slightly while narrowing widths. These shapes cut through water surface tension effortlessly, allowing flight in light winds.
- Recessed Deck Pads: Lowering the deck standing area brings your feet closer to the foil connection point. This lowers your overall center of gravity, increasing responsiveness during turns.
- Step-Tail Geometries: Sharp cutaways near the tail prevent water from clinging to the back of the board during pump-offs, resulting in clean release.
Whether you are evaluating your first setup or fine-tuning a light-wind gear kit, reviewing gear profiles at Locosurfing.com helps clear up volume choices so you get the right gear for your local spot.
Final Thoughts
Selecting the right board comes down to honest evaluation of your current skill level, body weight, and local wind patterns. Beginners benefit from generous volume to build confidence quickly, while experienced riders can step down to compact shapes for sharper carving control.