
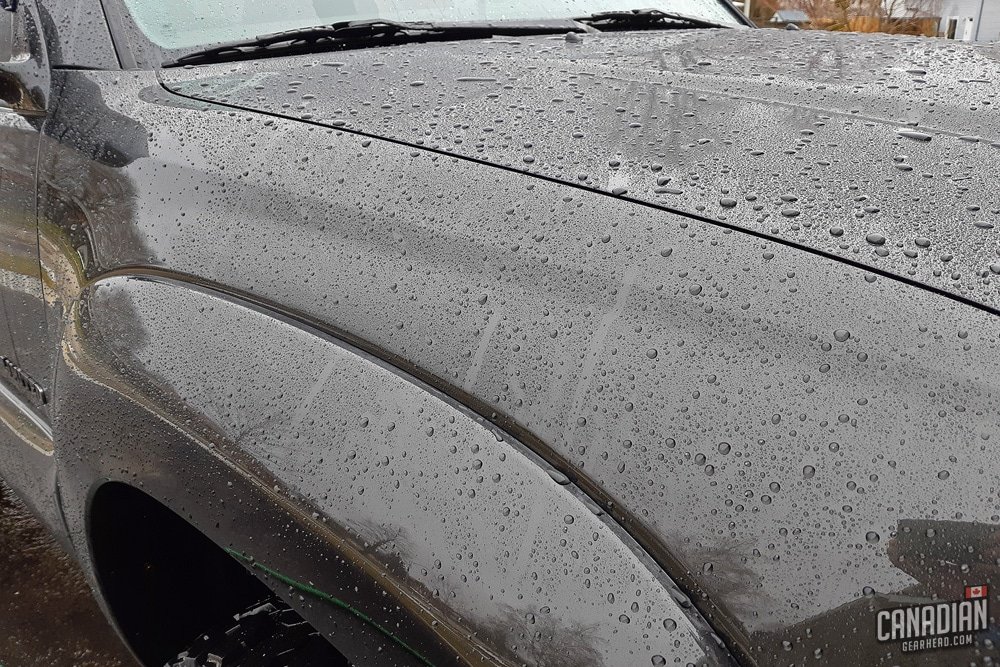
Ceramic coating failure occurs when silicon dioxide polymer cannot bond to paint substrate due to contamination, incorrect environmental conditions, or rushed curing processes. Most coating failures trace back to preparation shortcuts and application environment errors rather than product quality defects.
Understanding Ceramic Coating Chemistry and Bonding Requirements
Ceramic coating is a silicon dioxide-based liquid polymer that chemically bonds to automotive clear coat through condensation reaction. The coating molecules form covalent bonds with hydroxyl groups on paint surface, creating a semi-permanent protective layer measuring 2-5 microns thickness. This chemical bonding distinguishes ceramic coatings from mechanical protection methods like wax or sealant.
Ceramic coating is not a physical barrier that sits on top of paint. The coating penetrates into clear coat porosity at microscopic level, forming molecular-level attachment that resists removal through washing or environmental exposure. According to research from the Society of Automotive Engineers, proper ceramic coating bonding creates attachment strength 5-8x stronger than mechanical wax adhesion.
Coating Bonding Process: Chemical Requirements
The silicon dioxide cross-linking process requires specific conditions to complete successfully. Coating manufacturers formulate products with:
Solvent carriers that keep silicon dioxide in liquid suspension during application. Common solvents include isopropyl alcohol, aliphatic hydrocarbons, and glycol ethers. These carriers evaporate after application, leaving pure silicon dioxide to bond with paint.
Cross-linking catalysts that initiate chemical bonding between coating molecules and paint surface. These catalysts react with atmospheric moisture to begin condensation reaction, forming siloxane bonds that create hard protective layer.
Leveling agents that control surface tension, allowing coating to spread evenly across paint before curing begins. Proper leveling prevents high spots, streaking, and uneven film thickness that compromise appearance and protection.
Environmental Requirements for Successful Bonding
| Environmental Factor | Optimal Range | Acceptable Range | Failure Risk Zone | Primary Effect on Bonding |
|---|---|---|---|---|
| Temperature | 18-22°C | 15-25°C | Below 12°C or above 28°C | Curing speed and cross-linking completeness |
| Humidity | 45-55% | 40-65% | Below 35% or above 70% | Catalyst activation and leveling time |
| Air Movement | Minimal | Light circulation | Direct breeze/fan | Solvent evaporation rate and flash-curing |
| Surface Temperature | 18-24°C | 15-28°C | Below 15°C or above 30°C | Initial bonding and molecular movement |
| Ambient Light | Indirect natural or LED | Any non-UV | Direct sunlight | Surface temperature control |
The table shows narrow optimal ranges for successful coating application. According to installation standards from the International Detailing Association, applications outside acceptable ranges show 40-60% higher failure rates within first 12 months compared to controlled environment installations.
Temperature affects curing speed dramatically. Below 15°C, cross-linking reactions slow by 50-70%, creating weak initial bonds that never achieve full hardness. Above 25°C, accelerated curing reduces working time, causing application errors and uneven coverage.
Failure Cause 1: Inadequate Paint Decontamination
Contaminated paint prevents ceramic coating from bonding to clear coat surface. Iron particles, tar, tree sap, industrial fallout, and embedded brake dust create barrier layer that coating bonds to rather than paint itself. When contamination releases from paint surface, coating delaminates with it.
Paint contamination is any substance bonded to clear coat that prevents direct contact between ceramic coating and paint molecules. This includes ferrous particles embedded from brake dust, petroleum-based tar spots, tree sap acidic residue, and industrial fallout particulate. These contaminants measure 5-50 microns in size, creating sufficient barrier to prevent molecular bonding.
Paint contamination is not always visible to naked eye. Smooth-feeling paint may contain thousands of embedded particles detectable only through clay bar treatment or iron fallout testing. According to contamination research from Auto Express, vehicles driven 5,000-10,000 miles without decontamination carry 200-400 bonded particles per square foot of paint surface.
Complete Decontamination Protocol
Step 1: Iron fallout removal using pH-neutral iron remover spray. Apply to entire vehicle, allowing 5-8 minute dwell time for chemical reaction to dissolve embedded ferrous particles. Iron removers change colour (clear to purple) as they chelate iron particles, indicating active contamination removal. Rinse thoroughly with pressure washer.
Step 2: Tar and adhesive removal using dedicated tar remover or citrus-based degreaser. Focus on lower panels, wheel arches, sills, and rear bumper where road tar accumulates. Apply product, allow 2-3 minute dwell, agitate with microfibre towel, rinse completely.
Step 3: Clay bar treatment to remove remaining bonded contamination. Use medium-grade clay bar with clay lubricant, working in 2×2 foot sections. Clay bar removes contamination that survived chemical treatment, creating glass-smooth surface essential for coating adhesion. Fresh clay should glide smoothly when paint is fully decontaminated.
Step 4: Panel wipe preparation immediately before coating application. Use isopropyl alcohol (IPA) solution at 10-15% dilution or dedicated panel preparation product. This final step removes polishing oils, clay bar residue, and fingerprint oils that accumulate during preparation stages.
Contamination Impact on Coating Longevity
| Contamination Type | Bonding Impact | Failure Timeline | Visual Symptoms | Prevention Method |
|---|---|---|---|---|
| Iron Particles | Severe – creates physical barrier | 2-6 months | Orange spotting under coating, delamination around spots | Iron remover treatment |
| Tar Deposits | Severe – coating bonds to tar not paint | 1-4 months | Localized peeling, soft spots in coating | Tar remover, multiple applications |
| Tree Sap | Moderate – acidic etching and bonding interference | 3-8 months | Cloudiness, reduced gloss in affected areas | Sap remover, machine polishing if etched |
| Wax Residue | Severe – complete bonding prevention | Days to weeks | Sheet delamination, coating slides off paint | Panel wipe with IPA, verify water breaks cleanly |
| Polishing Oils | Moderate to severe | 1-6 months | Gradual adhesion loss, reduced hydrophobicity | Panel wipe, 24-hour wait after polishing |
According to coating failure analysis from the Journal of Coatings Technology, 60-70% of premature coating failures trace to inadequate contamination removal during preparation. The most overlooked contamination source is previous wax or sealant application requiring complete removal through panel wipe treatment.
Failure Cause 2: Incorrect Application Temperature
Temperature during coating application affects curing speed, working time, and final bond strength. Cold temperatures slow chemical cross-linking, preventing complete bonding. Hot temperatures accelerate curing, reducing spreading time and causing application errors.
Application temperature is the combined measurement of ambient air temperature and paint surface temperature. Both factors influence coating behaviour during application and initial curing. Surface temperature typically runs 2-5°C higher than ambient air in indoor environments, but can exceed ambient by 10-15°C in direct sunlight.
Application temperature is not just the garage or workshop air temperature. Black paint surfaces in 20°C room temperature may measure 25-28°C surface temperature under LED lighting. Light-coloured panels in same environment measure closer to ambient temperature. Surface temperature variations across vehicle require monitoring with infrared thermometer.
Temperature Effects on Coating Performance
Cold application (below 15°C) creates multiple failure mechanisms:
- Cross-linking reactions slow by 40-60%, extending cure time from 7 days to 14-21 days
- Coating viscosity increases, making even spreading difficult
- Solvent evaporation slows, trapping solvents in coating film
- Initial bonding strength reaches only 60-75% of warm-temperature applications
- Final hardness may never achieve rated 9H specification
Hot application (above 25°C) causes different problems:
- Flash-curing reduces working time from 90-120 seconds to 30-45 seconds
- Rapid solvent evaporation creates uneven film thickness
- High spots and streaks form before leveling completes
- Coating may begin curing during application, creating visible overlap marks
- Reduced penetration into clear coat porosity
Temperature Control for Professional Results
| Application Scenario | Ambient Temperature | Surface Temperature | Required Adjustments | Working Time Available |
|---|---|---|---|---|
| Ideal Conditions | 18-22°C | 18-24°C | None – proceed normally | 90-120 seconds per panel |
| Cool Environment | 15-17°C | 15-19°C | Panel heating with IR lamps, extend cure time 50% | 120-150 seconds per panel |
| Warm Environment | 23-25°C | 24-28°C | Increase air conditioning, work faster, smaller sections | 60-90 seconds per panel |
| Cold (Not Recommended) | 12-14°C | 12-16°C | Panel heating essential, double cure time | 150-180 seconds per panel |
| Hot (High Risk) | 26-28°C | 28-32°C | Work in early morning, AC blast, tiny sections | 45-60 seconds per panel |
Professional installers using products from Gtechniq maintain dedicated temperature-controlled application bays at 19-21°C year-round. This environmental control eliminates temperature variables, ensuring consistent coating performance across all installations regardless of external weather conditions.
Failure Cause 3: Insufficient Curing Time Before Water Exposure
Premature water contact disrupts ceramic coating curing process, preventing full hardness development and compromising bonding strength. The silicon dioxide cross-linking reaction requires dry conditions for 7-30 days depending on environmental factors and coating formulation.
Coating curing is the chemical process where silicon dioxide molecules form cross-linked polymer network through condensation reactions. This process begins immediately after application but continues for weeks as coating molecules bond with each other and with paint surface. During curing, coating progresses from liquid to gel to hard film state.
Coating curing is not complete when coating feels dry to touch. Initial surface curing occurs within 1-4 hours, creating dry feel, but internal cross-linking continues for 7-30 days. Water exposure during this curing period interferes with ongoing chemical reactions, reducing final coating hardness by 20-40% according to coating performance research from Auto Express.
Curing Timeline and Hardness Development
Hour 0-4: Initial flash cure
- Solvent carriers evaporate (80-95% completion)
- Surface feels dry to light touch
- Coating remains chemically reactive and soft
- Coating hardness: 1-2H (pencil hardness scale)
- Water contact risk: Severe damage, coating may wash away completely
Day 1-3: Primary cross-linking
- Silicon dioxide molecules begin forming polymer chains
- Coating achieves 30-40% of final hardness
- Surface safe for light dusting or bird dropping removal (no water)
- Coating hardness: 3-4H
- Water contact risk: High – disrupts bonding, reduces final hardness
Day 4-7: Secondary bonding
- Cross-linking reaches 60-70% completion
- First water contact acceptable if necessary (light rain, emergency rinse)
- No pressure washing, automated washes, or chemical application
- Coating hardness: 5-7H
- Water contact risk: Moderate – may reduce ultimate performance
Day 8-30: Final curing
- Cross-linking approaches 90-100% completion
- Normal washing acceptable after day 14
- Full chemical resistance develops
- Coating hardness: 8-9H (rated specification)
- Water contact risk: Minimal after day 14, none after day 30
Water Exposure Impact on Coating Performance
| Water Contact Timing | Hardness Achievement | Bonding Strength | Hydrophobicity | Durability Loss | Recovery Possible? |
|---|---|---|---|---|---|
| 0-24 hours | 20-40% of rated | Very poor | 30-50% | 60-80% | No – complete failure likely |
| 1-3 days | 40-60% of rated | Poor | 50-70% | 40-60% | Partial – reapplication recommended |
| 4-7 days | 60-80% of rated | Fair to good | 70-85% | 20-40% | Yes – may achieve acceptable performance |
| 8-14 days | 80-95% of rated | Good | 85-95% | 10-20% | Yes – minimal long-term impact |
| 15-30 days | 95-100% of rated | Excellent | 95-100% | 0-10% | Full performance achieved |
The table demonstrates exponential improvement in coating resilience over time. Water exposure in first 72 hours creates permanent performance reduction, while exposure after 14 days shows minimal long-term impact. According to warranty analysis from coating manufacturers, 30-40% of warranty claims trace to premature water exposure during curing period.
Failure Cause 4: High Spots and Uneven Application Thickness
Uneven coating application creates aesthetic defects and performance problems. High spots appear as dark patches or streaks where excess coating accumulates. These areas experience premature failure through cracking and delamination as thick coating film develops internal stress.
High spots are areas where excess coating product creates film thickness 2-5x normal application. Standard ceramic coating film measures 2-3 microns when properly applied. High spots reach 5-15 microns thickness, visible as darker patches or rainbow-effect streaking on paint surface.
High spots are not purely cosmetic defects. Excessive coating thickness creates mechanical stress as coating cures and contracts. Thick areas cure at different rates than properly applied sections, causing differential shrinkage that pulls coating away from paint surface. According to coating application research from the Society of Automotive Engineers, coating thickness variations above 50% baseline increase delamination risk by 200-300%.
Application Technique for Even Film Thickness
Cross-hatch application pattern ensures even coating distribution. Apply coating in vertical strokes, then immediately cross with horizontal strokes before buffing. This technique spreads product uniformly, preventing line patterns and thickness variations.
Proper product quantity determines final film thickness. Most ceramic coatings require 3-8 drops per 2×2 foot section depending on formulation and paint porosity. New paint with low porosity needs less product than weathered paint with high porosity. According to application standards from the International Detailing Association, proper dosing creates 2-3 micron film thickness with optimal performance characteristics.
Immediate buffing removes excess coating before flash-cure. Most coatings allow 60-120 seconds working time between application and buffing. Buffing removes high spots, evens film thickness, and prevents rainbow streaking. Use separate microfibre towels for application and buffing to avoid cross-contamination.
Secondary buff pass after 5-10 minutes catches residual high spots. Some coatings develop slight haziness during initial cure, indicating areas needing additional buffing. This second pass removes final traces of excess product before coating hardens beyond workability.
Common Application Errors and Visual Symptoms
| Application Error | Visual Symptom | Touch Feel | Long-term Effect | Correction Method |
|---|---|---|---|---|
| Too much product | Dark streaks, rainbow effect | Raised ridges | Cracking, peeling in 3-12 months | Re-buff within 4 hours or polish off and reapply |
| Insufficient buffing | Hazy appearance, dull patches | Slightly rough | Reduced gloss, shorter lifespan | Buff again within 2 hours or coating remover |
| Overlapping passes | Doubled darkness in overlap zones | Textured lines | Edge lifting, delamination | Careful buffing of overlap, may require removal |
| Flash-curing before buff | Hard raised spots | Significantly rough | Immediate visible defects | Machine polishing to remove, proper prep and reapply |
| Uneven spreading | Patchy appearance, varying gloss | Inconsistent | Uneven protection and durability | Immediate re-work or complete removal |
According to installer feedback from detailing forums, high spots represent 40-50% of coating application complaints. Most occur from excessive product use or delayed buffing allowing flash-cure. Products from Gtechniq include detailed application guides specifying exact product quantities and timing to prevent these errors.
Failure Cause 5: Contamination During Application Process
Airborne contamination landing on wet coating creates bonded defects that compromise appearance and protective performance. Dust particles, pollen, insects, and fibres embed in coating during application and curing, creating permanent surface imperfections.
Application contamination is any foreign material that contacts coating between initial application and final cure. This includes workshop dust, lint from buffing towels, pollen from open doors, insects attracted to lighting, and fibres from clothing. These contaminants measure 10-1000 microns, easily visible as surface defects in cured coating.
Application contamination is not limited to visible particles. Invisible contaminants include silicone overspray from nearby detailing work, aerosol particles from air fresheners, and volatile organic compounds from paint or chemicals in same workspace. These create bonding interference without obvious visual symptoms until coating begins failing months later.
Controlled Application Environment Requirements
Enclosed workspace prevents airborne contamination from entering application area. Dedicated coating bays with positive air pressure filtration remove 95-99% of particles above 10 microns. Home garage applications require closing doors and waiting 30-60 minutes after opening for airborne dust to settle before coating application begins.
Clean air circulation without direct air movement prevents contamination while maintaining proper humidity. HEPA filtration systems or ceiling-mounted air purifiers remove particulate without creating wind that accelerates coating flash-cure. Avoid fans, AC vents pointed at vehicle, or open windows during application.
Dedicated coating towels used only for ceramic coating work prevent cross-contamination from previous detailing products. New microfibre towels often contain manufacturing oils and fibres requiring pre-washing before coating use. According to contamination testing from Auto Express, unwashed towels deposit 200-500 fibres per square foot during buffing operations.
Proper lighting reveals contamination during application, allowing immediate correction. LED lighting at 3,000-5,000 lumens positioned at multiple angles shows coating defects invisible in dim conditions. Contamination removed during application prevents permanent bonding.
Contamination Sources and Prevention Methods
| Contamination Source | Particle Size | Visibility | Damage Severity | Prevention Strategy |
|---|---|---|---|---|
| Workshop Dust | 5-100 microns | Visible in light | Moderate – surface defects | Close doors 1 hour before application, HEPA filtration |
| Towel Lint | 50-500 microns | Highly visible | Minor to moderate | Pre-wash all towels 3x, use dedicated coating towels |
| Pollen (Seasonal) | 10-100 microns | Visible | Minor | Keep doors closed, apply in winter/late autumn |
| Insects | 1-10mm | Very obvious | Severe localized | Reduce lighting during cure, screen doors/windows |
| Silicone Overspray | Molecular | Invisible initially | Severe – bonding failure | No silicone products in workspace for 48 hours before coating |
| Buffing Compound Residue | 1-50 microns | Usually invisible | Moderate – bonding interference | Thorough panel wipe, dedicated coating preparation area |
The table shows silicone contamination creates most severe problems despite invisibility during application. Silicone-based tire shine, trim dressings, and dashboard sprays create airborne silicone particles that prevent ceramic coating adhesion for 24-48 hours after use in same workspace. Professional installers maintain silicone-free environments or use separate bays for coating application versus general detailing work.
Failure Cause 6: Applying Over Defective or Failing Clear Coat
Ceramic coating cannot repair damaged clear coat or prevent continuing deterioration. Application over failing clear coat creates false appearance of repair while underlying paint continues degrading, causing coating and clear coat to fail together within months.
Clear coat failure is the breakdown of automotive clear coat through UV oxidation, chemical etching, or delamination from base coat. Symptoms include cloudiness, flaking, peeling, spider-web cracking, and chalky texture. Failed clear coat has lost molecular integrity and cannot provide stable substrate for ceramic coating bonding.
Clear coat failure is not reversible through coating application. Ceramic coating bonds to clear coat surface but does not penetrate to repair damaged molecular structure beneath. Coating over failed clear coat masks defects temporarily but fails rapidly as underlying clear coat continues deteriorating.
Identifying Clear Coat Condition Before Coating
Visual inspection reveals obvious clear coat failure through:
- Cloudy or milky appearance in affected areas
- Visible flaking or peeling at panel edges
- Spider-web cracking patterns (clear coat delamination from base coat)
- Chalky or rough texture when touched
- Colour variation indicating base coat exposure
Water behaviour test identifies early clear coat degradation:
- Apply water to suspected areas
- Healthy clear coat shows even water beading or sheeting
- Degraded clear coat shows water soaking into surface
- Failed clear coat shows water pooling in crazing or cracks
Tape test for clear coat adhesion:
- Apply strong masking tape to suspected area
- Press firmly, smooth out air bubbles
- Peel tape back at 90-degree angle
- Clear coat should not lift or peel with tape
- Any clear coat removal indicates failure requiring correction
Clear Coat Failure Patterns and Coating Implications
| Failure Type | Visual Symptoms | Cause | Coating Application Result | Required Correction |
|---|---|---|---|---|
| UV Oxidation | Cloudiness, dull finish, chalky feel | Sun exposure, age | Coating bonds but fails within 6-12 months as oxidation continues | Machine polish to remove oxidized layer, then coat |
| Chemical Etching | Dull spots, rough texture, visible marks | Bird droppings, tree sap, industrial fallout | Uneven coating appearance, early failure in etched areas | Wet sand or polish to restore smooth surface |
| Clear Coat Delamination | Flaking, peeling, spider-web cracks | Age, impact damage, poor paint work | Complete coating failure within weeks to months | Strip to base coat, respray clear coat, cure, then coat |
| Water Spotting | Raised rings, volcanic texture | Hard water mineral deposits | Coating bonds to deposits creating rough finish | Vinegar treatment or polishing to remove deposits |
| Swirl Marks | Fine scratches visible in light | Improper washing, automatic car washes | Coating highlights defects, making them permanent | Machine polish to remove scratches before coating |
According to paint condition research from What Car? Magazine, ceramic coating application over oxidized or failing clear coat represents 15-20% of coating failure cases. The coating itself performs as designed, but substrate failure causes system-wide breakdown.
Professional paint correction before coating ensures stable substrate. Machine polishing removes 1-3 microns of oxidized or damaged clear coat, exposing fresh clear coat with proper molecular structure for ceramic coating bonding. Vehicles with severe clear coat failure require complete respray before coating application.
Failure Cause 7: Incompatible Product Layering
Applying ceramic coating over incompatible products or layering incompatible coatings creates chemical conflicts preventing proper bonding. Different coating chemistries, previous sealants, and prep products can interfere with coating adhesion and curing.
Product compatibility is the chemical ability of different detailing products to coexist without adverse reactions. Compatible products use similar base chemistries, matching pH ranges, and non-reactive compounds. Silicon dioxide-based ceramic coatings are compatible with other SiO2 coatings but may conflict with graphene, polymer, or hybrid formulations.
Product compatibility is not guaranteed between products from different manufacturers, even if both are ceramic coatings. Proprietary formulations use different solvent carriers, leveling agents, and catalysts that may react negatively when layered. According to coating compatibility testing from the International Detailing Association, cross-brand coating layering shows 25-40% higher failure rates compared to same-brand coating systems.
Common Incompatibility Problems
Coating over spray sealant creates bonding failure when sealant contains polymer or silicone base. Most spray sealants marketed as “ceramic spray coatings” use hybrid polymer formulations incompatible with true silicon dioxide coatings. Panel wipe removes spray sealant before professional coating application.
Layering different coating brands causes adhesion issues from different base chemistries:
- Brand A coating cures to specific surface energy profile
- Brand B coating formulated to bond with different surface energy
- Second coating bonds poorly or not at all to first coating
- Delamination occurs between coating layers within 1-6 months
Trim coating contamination from silicone-based trim restorers prevents coating adhesion on adjacent paint. Silicone migrates from trim to paint surface through capillary action and washing, creating invisible contamination that rejects ceramic coating. Careful masking during trim treatment prevents contamination transfer.
Product Layering Compatibility Matrix
| Previous Product | Wait Time Before Coating | Removal Required? | Compatibility Risk | Recommended Action |
|---|---|---|---|---|
| Carnauba Wax | 24-48 hours | Yes – panel wipe | High – complete bonding prevention | IPA wipe at 15% dilution, verify water breaks cleanly |
| Spray Sealant | 48-72 hours | Yes – panel wipe | High – chemical conflict likely | Panel wipe, may require light polish to ensure removal |
| Previous Ceramic Coating (Same Brand) | No wait needed | No | Low – designed for layering | Light decontamination, panel wipe, proceed normally |
| Previous Ceramic Coating (Different Brand) | 12-24 months | Sometimes | Moderate to high | Test application on small area, consider coating removal |
| Polish Residue | 12-24 hours | Yes – panel wipe | Moderate – oils prevent bonding | Thorough panel wipe, verify no polish residue remains |
| Compound Residue | 24 hours | Yes – panel wipe | Moderate | Multiple panel wipe passes, may need rewash if heavy residue |
| Silicone Tire Shine | 48 hours | Yes – rewash entire vehicle | Very high | Wash vehicle completely, panel wipe all surfaces |
The matrix shows wax and silicone products create highest incompatibility risk. According to coating failure analysis from detailing professionals, 20-30% of home DIY coating failures trace to inadequate removal of previous protection products before ceramic coating application.
Professional installers verify surface preparation completeness through water break test. Clean, product-free paint shows water sheeting evenly across panels with no beading. Any water beading indicates remaining wax, sealant, or polish oils requiring additional panel wipe treatment before coating application proceeds.
Frequently Asked Questions
Why does ceramic coating fail after a few months?
Ceramic coating fails prematurely when applied over contaminated paint surfaces, in incorrect environmental conditions, or without proper curing time. The most common failure causes include iron contamination embedded in paint (prevents bonding), application in temperatures below 15°C (slows chemical cross-linking), and washing within 7 days of application (disrupts curing process). These errors prevent the silicon dioxide polymer from forming proper molecular bonds with clear coat.
What happens if you apply ceramic coating over wax?
Applying ceramic coating over wax creates immediate bonding failure because coating cannot penetrate wax layer to reach paint surface. Wax acts as barrier preventing silicon dioxide molecules from forming chemical bonds with clear coat. The coating appears to apply normally but delaminates within days or weeks as it bonds only to wax layer rather than paint substrate. Complete wax removal using panel wipe or isopropyl alcohol is essential before ceramic coating application.
Can you fix ceramic coating that’s peeling off?
Failed ceramic coating requires complete removal before reapplication. Peeling coating cannot be repaired or topped up because underlying adhesion failure will continue spreading. Remove failed coating using dedicated coating removers, machine polishing with cutting compound, or in severe cases, wet sanding. After removal, proper paint preparation including decontamination and panel wipe ensures successful reapplication with full adhesion.
How long should ceramic coating cure before washing?
Ceramic coating requires minimum 7 days curing before first wash, with full hardness achieved after 30 days. During initial curing, avoid water contact, automated car washes, and parking in rain. The silicon dioxide cross-linking process continues for weeks after application, with coating reaching only 60-70% hardness after 7 days and 90-95% after 30 days. Premature washing disrupts molecular bonding, reducing final coating hardness and durability.
Does humidity affect ceramic coating application?
High humidity above 70% causes ceramic coating flash-curing and streaking because moisture accelerates silicon dioxide cross-linking before proper leveling. The coating begins hardening within seconds rather than allowing 1-2 minute working time for even spreading. This premature curing creates visible high spots, streaks, and uneven film thickness. Optimal application humidity ranges between 40-65% for proper coating flow and leveling before curing begins.